

Materiais:
caixa 22x15x8,5cm, lixa, tintas para madeira, cola permanente (só se usa num momento), cola generalista para pincel, cola UHU em bisnaga, tecido (superior 26x19cm, lateral superior 76x4cm, lateral inferior 76x7cm), placa de isopor 22x15cm, enchimento 22x15cm com a altura pretendida, papel autocolante aveludado 22x15cm, fita grega 220cm, linhas grossas e finas, missangas/lantejoulas 11 de cada
 Materials:
box 22x15x8,5cm, sandpaper, wood paint, permanent glue (only used at a time), general glue for brush, tube of UHU glue, fabric (top 26x19cm, upper side 76x4cm, lower side 76x7cm), styrofoam plate 22x15cm, polyfill 22x15cm with the desired height, velvet sticker paper 22x15cm, brown ribbon 220cm, thick and thin lines, beads/sequins 11 of each

pincel, godés, tesoura, chave de parafusos estrela, lápis, fita métrica/régua, agulhas
Tools:
brush, pots, scissor, star screwdriver, pencil, tape measure/ruler, needles
brush, pots, scissor, star screwdriver, pencil, tape measure/ruler, needles
1- Preparação da caixa. Interior: lixar, pintar com um primário, lixar novamente e pintar com a cor desejada. Exterior: retirar as ferragens, lixar, pintar com um primário, lixar novamente e pintar de branco para realçar o tecido.

1- Preparation of the box. Inside: sanding, painting with a primer, sanding and painting again with the desired color. Exterior: remove the hardware, sand, paint with a primer, sanding again and painting with white to highlight the fabric.

2- Revestimento do exterior da caixa. Aplique cola, depois o tecido e cola novamente para um melhor revestimento.

2- Coating the outside of the box. Apply glue, then the fabric and glue again for a best finish of the fabric.


3- Acabamento do exterior da caixa. Cole a fita grega à volta com cola UHU e o papel autocolante aveludado na base. Agora que a caixa está pronta, vamos passar à tampa que está intacta.
3 - Finishing outside the box. Glue ribbon around the box with UHU and velvety adhesive paper at the base. Now the box is ready, let's move on to the cover that is intact.


4- Realização do Capitoné. Sobreponha o isopor, o enchimento e o tecido, verificando se coloca o tecido na posição que pretende. Volte o conjunto para baixo e aplique cola permanente (só é usada aqui) no rebordo do isopor.
4 - Making Capitoné. Overlap styrofoam, fabric and polyfill, making sure the fabric is placed in the position you want. Return the set down and apply permanent glue (only used here) on the edge of styrofoam.

Comece por puxar os cantos do tecido e depois faça o mesmo com as laterais, segurando firmemente. O tecido não agarra muito bem, por isso seja persistente e faça pressão durante algum tempo até o tecido se manter na posição.
Start by pulling the corners of the fabric and then do the same with the sides, holding firmly. The fabric slide, so be persistent and push for some time until the fabric is maintained in position.
Start by pulling the corners of the fabric and then do the same with the sides, holding firmly. The fabric slide, so be persistent and push for some time until the fabric is maintained in position.

Volte o almofadado para cima e, com pequenas marcações a lápis, divida-o em partes iguais (eu não o fiz para realçar um pormenor do tecido. Divida consoante o tecido e o seu gosto). Faça agora as divisões colando fita grega. Com uma agulha e linha grossa, passe em todos os cruzamentos da fita, 3 vezes em cada um, apertando firmemente para sobressair o relevo. No entanto, tenha cuidado porque a placa de isopor é frágil.
Turn the cushioned up and, with small pencil marks, divide it into equal parts (I didn't do it to highlight a detail of the fabric. Do it as you prefer). Now make the divisions by gluing ribbon. With a thick needle and thread, pass all the ribbon intersections, 3 times in each one, pressing firmly to enhance relief. However, be careful because the styrofoam plate is fragile.
Turn the cushioned up and, with small pencil marks, divide it into equal parts (I didn't do it to highlight a detail of the fabric. Do it as you prefer). Now make the divisions by gluing ribbon. With a thick needle and thread, pass all the ribbon intersections, 3 times in each one, pressing firmly to enhance relief. However, be careful because the styrofoam plate is fragile.

O aspeto inferior será semelhante a este. The bottom aspect will look like this.

Repita agora o processo, mas com uma agulha e linha fina. Vamos passar novamente em todos os cruzamentos, aplicando missangas e lantejoulas. Enfie a lantejoula e depois a missanga na agulha, e passe por dentro da lantejoula. Próximo cruzamento...
Now repeat the process, but with a thin needle and thread. Let's go again at all intersections, applying beads and sequins. Insert sequin and then bead in the needle, and pass into the sequin. Next intersection ...
Now repeat the process, but with a thin needle and thread. Let's go again at all intersections, applying beads and sequins. Insert sequin and then bead in the needle, and pass into the sequin. Next intersection ...

O aspeto inferior será semelhante a este. The bottom aspect will look like this.

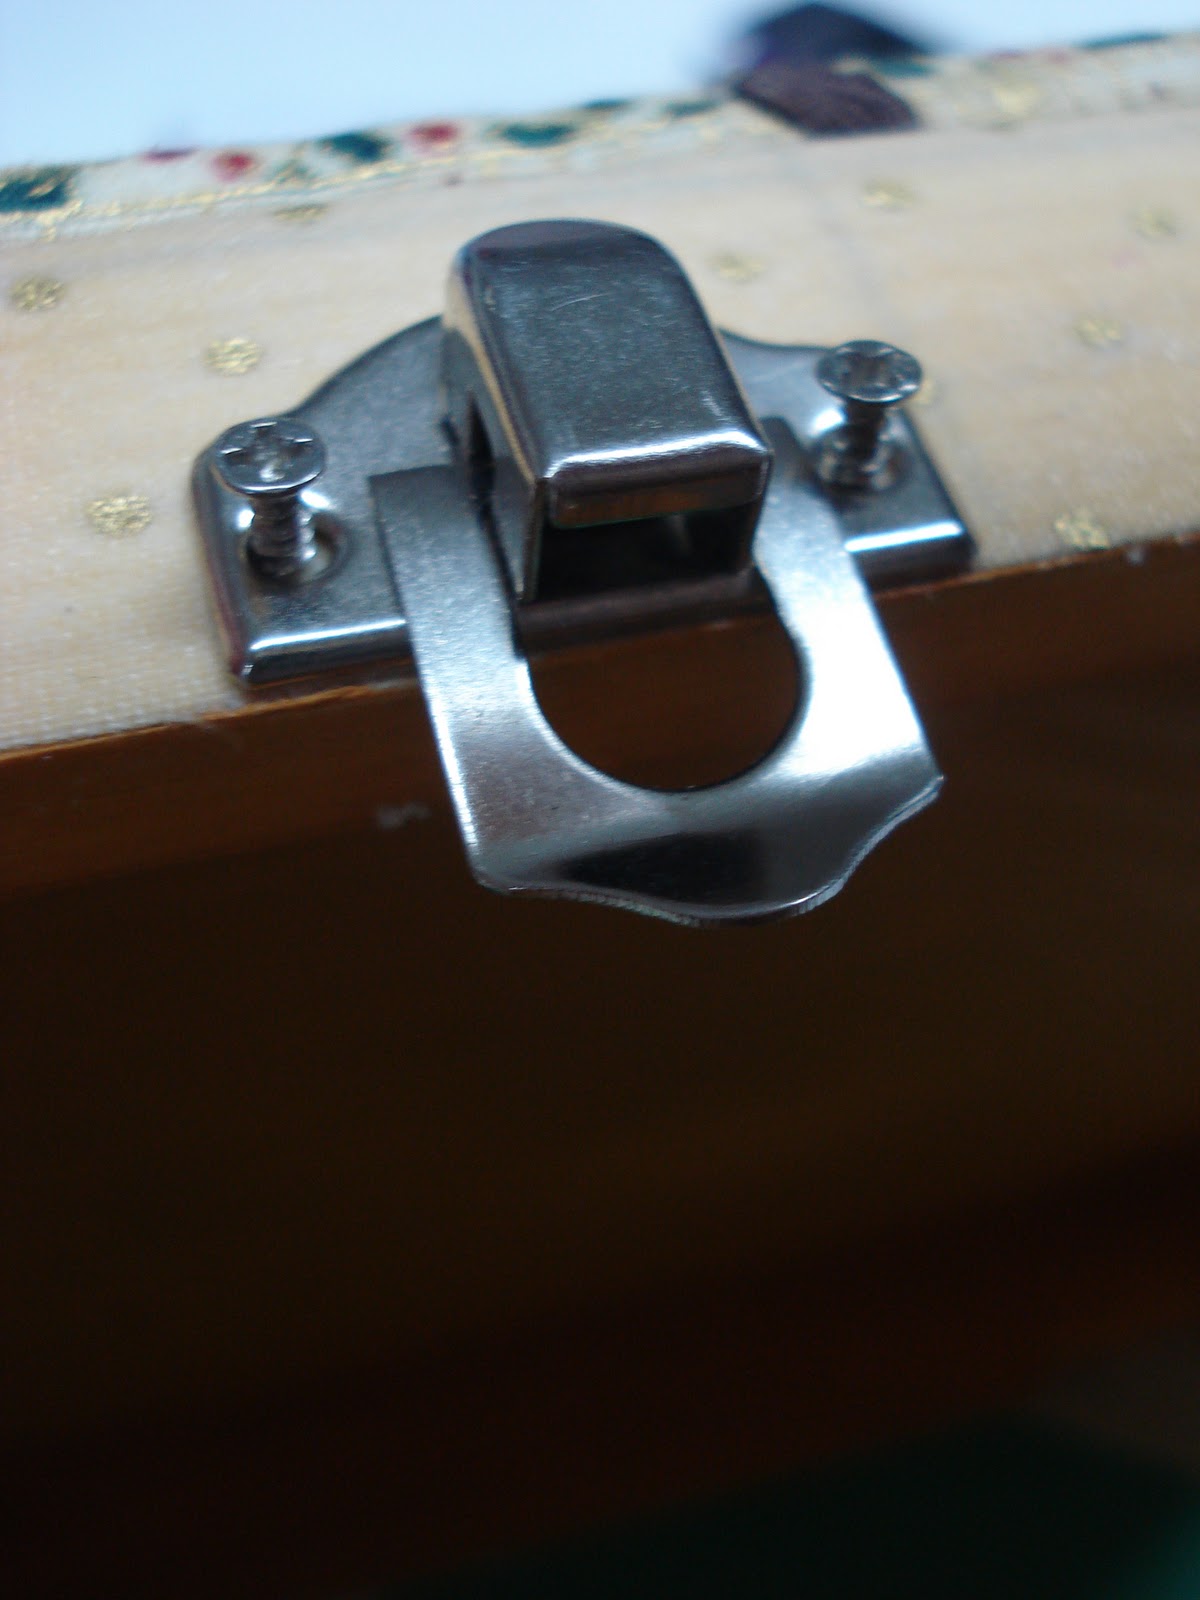
5- Colocação das ferragens com a chave de parafusos estrela.
5 - Placement of the hardware with the star screwdriver.
5 - Placement of the hardware with the star screwdriver.
6- Está pronto! Parabéns! This is it! Congratulations!


Sem comentários:
Enviar um comentário